New to scleral lenses? Here’s a beginner’s guide to inserting and removing scleral lenses.
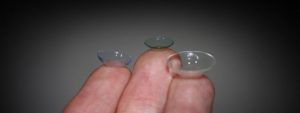
Scleral lenses are larger than the traditional hard or rigid gas permeable (RGP) contact lenses, so learning how to use them may take a little time and patience.
Your eye doctor’s staff will ensure you learn the basic steps to insert, remove and care for your new scleral lenses before you take them home.
Always speak to your eye doctor if you are experiencing any discomfort or have any questions about your scleral lenses.
Note: This article is not intended to be a substitute for the instructions or medical advice from your eye care professional.
How to put in your scleral contact lenses
Always insert the same lens into the same eye first to avoid confusion.
- Wash your hands thoroughly with a mild soap and water, and dry your hands on a lint-free cloth or towel.
- Place a flat mirror on the table in front of you and inspect your eyes for any redness or discharge.
- Holding your scleral lens up to the light, carefully check for any chips, debris, or white or cloudy spots.
Using the tripod or three-finger method:
- Hold the lens with your thumb, index, and middle fingers.
- Fill the bowl of the lens completely with a preservative free saline recommended by your eye doctor. Filling the bowl completely will help to prevent an air bubble.
- Ensure that your body is parallel to the floor and look downwards at the mirror on the table. You may want to draw a fixation dot on the mirror.
- Using your non-dominant hand, hold your upper and lower eyelids open. Don’t release your eyelids until your scleral lens is comfortably positioned on your eye.
- Move the lens toward the center of your eye.
- When you feel the solution against your eye, gently press the lens to your eye and let go. The lens will adhere to your eye.
- Release your lens and blink several times to help the lens find the correct position on your eye.
Using the DMV scleral or plunger:
- Lightly squeeze the grip of the DMV as you place the lens in the center of the plunger.
- Release your grip on the DMV once the lens is positioned and suctioned to the DMV.
- Fill the bowl of the lens completely with saline solution to avoid an air bubble.
- Looking straight down at your mirror and/or fixation dot, hold your eyelids open with your non-dominant hand.
- Move the DMV toward the center of your eye.
- When you feel the lens touch your eye, lightly squeeze the DMV to release the lens.
- Blink a few times to help the lens find the correct position on your eye.
- Repeat this process with your second scleral lens.
If you feel any discomfort following insertion of your scleral lens, remove the lens and insert again.
If you experience eye discomfort from your scleral lenses, promptly remove your lenses and consult with an eye doctor.
SEE RELATED: Scleral Lenses for Dry Eyes
How to remove your scleral contact lenses
Always remove the same lens first to avoid confusion.
- Wash your hands thoroughly with mild soap and water and dry on a lint free towel.
- Always remove the same lens first to avoid confusion.
- Look straight into the mirror.
- Using your index finger, press your lower eyelid into your eye below the lens to break the suction between the lens and your eye.
- When the suction is broken, you will notice an air bubble under the lens.
- Pull your lower eyelid down until you can clearly see the lower edge of your lens.
- Hold the DMV to the lower third part of your lens (NOT the center of the lens)
- When you feel the DMV suction to the lens, gently pull it up and out to avoid scratching your eye.
- Squeeze the grip of the DMV to release its suction on the lens.
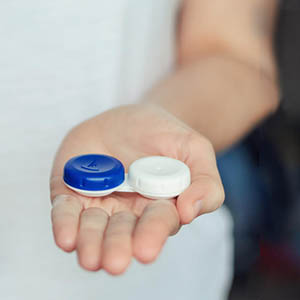
- Place the lens in a clear storage case filled with fresh saline solution.
Which solutions are best for scleral lenses?
Scleral lenses require a few different types of lens solutions to keep them clean, sterile and safe for your eyes.
1. A multi-purpose solution (MPS) is necessary to remove any debris from the surface of your lens — this could be a saline or other MPS solution used for hard lenses.
2. A peroxide cleaner is then used to sterilize your lenses with a deep cleaning action as the lenses sit inside your storage case, usually overnight while you sleep.
Note that the peroxide solution takes six hours to work, as it gradually turns into a diluted solution that is safe for your eyes.
If you try to re-insert your lenses before waiting the full six hours, it will cause a painful stinging sensation.
3. A preservative-free filling solution is used to fill the bowl of your scleral lens prior to insertion.
Never use tap water or any solution not recommended by your eye doctor as these can cause serious eye infections.
LEARN MORE: Optical and Contact Lenses
If at any time you experience eye discomfort from your scleral lenses, or changes to your vision, promptly remove your lenses and consult with an eye doctor.
While scleral lens insertion and removal may be challenging at first, the more you practice, the more natural it will feel.